
During the home framing stage what to look for includes verifying that all walls are plumb, studs are correctly spaced, and the structural skeleton aligns with your architectural blueprints. You should also inspect for quality lumber, secure floor joists, and properly framed window openings to prevent long term issues such as squeaky floors or uneven surfaces.
Watching your home take shape during the framing stage is exhilarating, yet it often brings a hidden layer of anxiety regarding structural integrity. Errors made during this phase do not simply vanish; they manifest later as uneven floors, cracked drywall, or chronic moisture issues that are costly to remediate once the home is finished. As the skeleton of your investment, the frame dictates the long-term stability and performance of the entire structure. Understanding what to look for at this juncture is not about micromanaging, it is about ensuring the craftsmanship matches the engineering specifications. This guide provides a practical, expert checklist for the framing stage, covering everything from load-bearing points and common installation mistakes to the critical elements of a successful frame walk. You will gain the technical insight needed to identify potential problems before they are sealed behind the walls forever.
Understanding the Framing Stage in the Custom Home Building Process
The framing stage represents the pivot point in the custom home building process where two dimensional blueprints transform into a three dimensional reality. We often describe this phase as building the "bones" or the structural skeleton of the home. For the first time, you will be able to walk through your future hallways and visualize the actual scale and layout of each room. Seeing the physical boundaries of a kitchen or a master bedroom offers a perspective that paper plans simply cannot provide.
At Grindstone Utility Construction, we emphasize that for residents in Jamesport and across Missouri, the framing stage is critical for long term durability. Our regional weather patterns, including high winds and heavy seasonal loads, require a frame that is both rigid and precisely engineered. This structural integrity ensures the house remains square and stable for decades. Providing professional residential building services means prioritizing these structural details before any cosmetic finishes are applied.
It is helpful to distinguish between "rough framing" and the subsequent "rough in" phase. Rough framing focuses on the primary structural components: the floor systems, the interior and exterior walls, and the roof rafters or trusses. This forms the shell of the building. Once this skeleton is complete and passed by local inspectors, the project transitions into utility rough ins. This is when plumbers, electricians, and HVAC technicians install the pipes, wires, and ductwork within the open wall cavities. Understanding this sequence is a key part of the home framing stage what to look for as you monitor progress. If you have questions about our construction expertise, we are here to guide you through these technical milestones.
Home Framing Stage What to Look For: A Homeowners Checklist
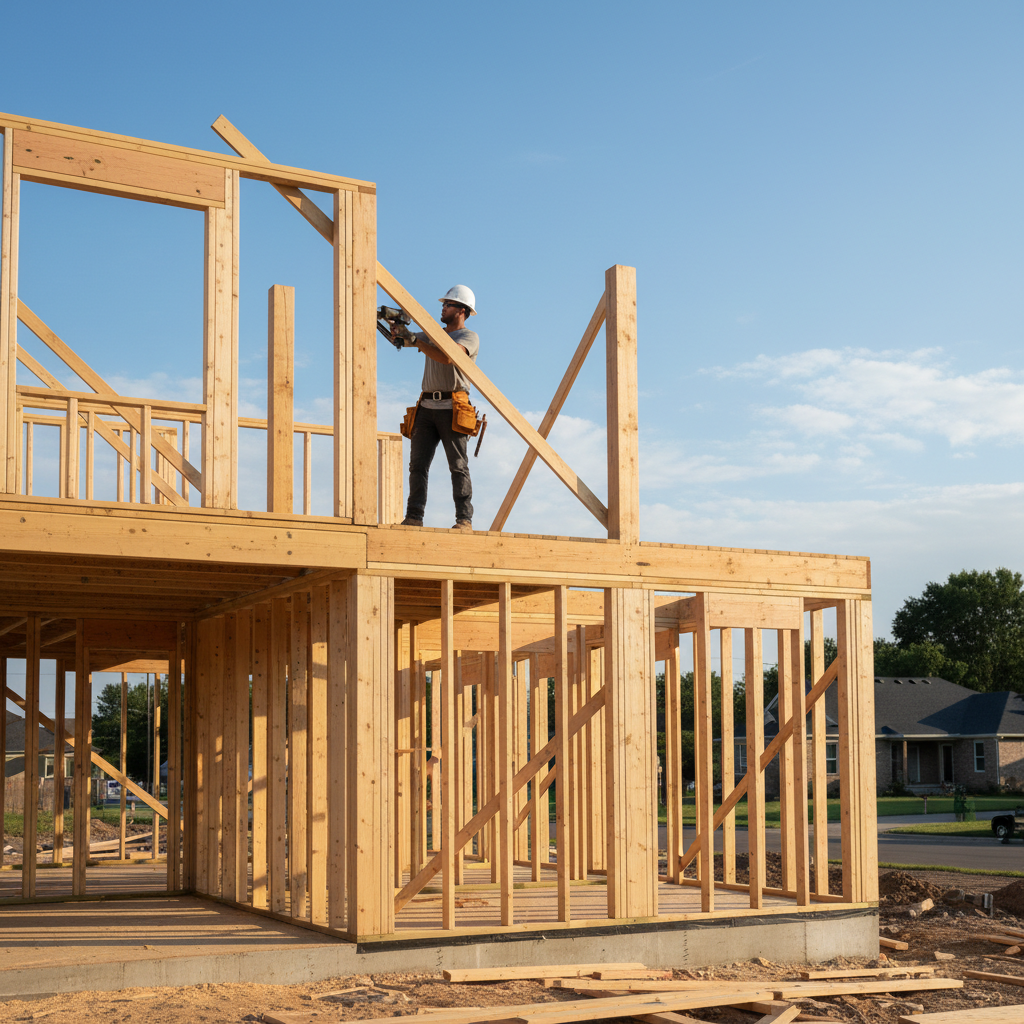
Walking through your home during the structural phase is an opportunity to verify that the quality of work meets long term standards. When evaluating the home framing stage what to look for, you should focus on the precision of the assembly rather than just the speed of progress. A well framed home reduces the likelihood of cosmetic issues, such as nail pops or uneven floors, appearing years down the road.
Use this checklist to assess the quality of the framing as you walk the site:
Wall Straightness and Alignment: Stand at the corner of a long wall and look down its length. The wall should be perfectly straight without bowing or crowning. If a stud is warped, it will create a visible wave in the drywall later. At Grindstone, we cull through lumber to ensure only the straightest studs are used for long hallways and kitchen walls where cabinetry must sit flush.
Sill Plate Anchoring: Locate the sill plate, which is the bottom horizontal board resting on the concrete foundation. This plate must be securely bolted to the foundation using anchor bolts and heavy duty washers. In our region of Missouri, this connection is the primary defense against wind uplift and lateral movement during severe weather.
Correct Stud Spacing: Measure the distance between vertical studs. Standard residential framing is typically set at 16 inches on center. This specific spacing provides the necessary structural support for the weight of the house and ensures that 4 foot wide sheets of drywall and exterior sheathing align perfectly with the wood for secure fastening.
Pressure Treated Lumber: Any wood that makes direct contact with concrete or masonry must be pressure treated. This lumber is chemically preserved to resist rot caused by moisture wicking through the concrete. You can identify this by its distinct green tint or the manufacturer’s stamp on the wood.
Adhering to these standards is how we provide professional residential building services that stand the test of time. By ensuring every wall is plumb and every joist is properly seated, we prevent the settling and shifting that leads to drywall cracking or floor squeaks. These details might seem small now, but they are the difference between a house that feels solid and one that requires constant maintenance. If you have questions about specific materials being used on your site, you can always ask us about our construction expertise during a site visit.
Critical Structural Details and Load Bearing Points
While walking the site, pay close attention to load bearing walls and headers. These components are responsible for the vertical transfer of weight from the roof and upper floors down to the foundation. Identifying these points is a vital part of the home framing stage what to look for, as these are the areas that sustain the most pressure over the life of the home. If a load bearing wall is not properly supported by the structure beneath it, the entire house can experience sagging or structural failure.
Every window and door opening disrupts the continuous vertical support of the wall. To compensate, we install headers, which are heavy horizontal beams that bridge the gap. A properly framed opening must include both king studs and jack studs. The king stud runs the full height of the wall next to the opening, while the jack stud is shorter, sitting inside the king stud to physically support the weight of the header. Ensure that the header is resting directly on the jack studs rather than relying solely on nails for support.
At Grindstone Utility Construction, our professional residential building services prioritize the precise sizing of headers based on the span and the specific load they must carry. Using an undersized header or failing to provide enough jack studs can lead to windows that stick or doors that will not close properly once the house settles. Correcting these structural oversights after the drywall is installed is incredibly costly and invasive. If you want to learn more about our construction expertise regarding specific Missouri engineering requirements for these load points, we can review the blueprints during a site visit.
Common House Framing Mistakes to Catch Early
Identifying errors during the skeleton phase prevents expensive, invasive repairs once the home is finished. When assessing the home framing stage what to look for, specific red flags often indicate a lack of precision that will manifest as functional problems later. One of the most common issues involves crowned floor joists. Almost every piece of dimensional lumber has a slight natural arch, known as the crown. Professional residential building services require that all joists be installed with the crown facing upward. This allows the weight of the subfloor and furniture to eventually level the wood. If joists are installed randomly, you will experience noticeable humps or dips in your flooring that are nearly impossible to correct after the finishes are applied.
In our region of Missouri, structural connectors are vital for safety. You should look for hurricane clips or structural ties, which are metal plates that mechanically fasten the roof trusses to the wall plates. In many cases, builders might skip these or use inadequate fasteners, leaving the roof vulnerable to uplift during high wind events or severe storms common in Jamesport. A frame that lacks these ties is significantly less resilient against lateral loads and extreme weather.
Another technical detail to monitor is the presence of "shiners." These are nails that were driven at an angle or in the wrong position, missing the stud or joist entirely. While they might seem like minor cosmetic errors, shiners provide zero structural value. Over time, as the lumber dries and the house settles, these misplaced nails will rub against the wood, resulting in persistent floor squeaks or wall pops that frustrate homeowners for years. If you notice a high frequency of shiners, it may indicate a lack of attention to detail that warrants a deeper discussion about our construction expertise and quality control standards. Catching these structural missteps now ensures the integrity of your home remains uncompromised.
The Importance of the Frame Walk with Your Builder

Once you have identified potential red flags and confirmed the structural integrity of the skeleton, the process moves toward a formal meeting known as the Frame Walk. As you evaluate the home framing stage what to look for during this walkthrough, focus on the alignment between the physical structure and your original vision. This site visit is a scheduled opportunity to walk through the structure with us to ensure the physical build matches your blueprints exactly. You should bring your final set of plans to this meeting, using them to verify every interior wall location, closet depth, and window opening.
This walk-through is critical because it represents the final opportunity to request adjustments to the layout before the rough-in phase begins. Moving a non-load-bearing wall or reversing a door swing is straightforward at this stage; however, once the plumbing and electrical lines are installed, these changes become significantly more complex and costly. At Grindstone Utility Construction, we use this time to help you visualize daily life in the space, ensuring kitchen island placement and window heights offer the functionality you intended.
For homeowners utilizing our professional residential building services, the Frame Walk also serves as a final check for utility placements. We discuss exactly where outlets, switches, and lighting fixtures should be located relative to your furniture plans. By confirming these details now, we ensure the mechanical systems are integrated seamlessly into the frame, reflecting about our construction expertise in creating homes tailored to the Jamesport climate and lifestyle.
Preparing for the Framing Inspection

Following the Frame Walk, the official framing inspection serves as a rigorous technical audit. While your personal site visits focus on the home framing stage what to look for regarding aesthetics and room flow, the municipal inspector prioritizes life safety and structural code compliance in the Jamesport region. A primary focus is fire blocking; these are horizontal wood members installed within wall cavities to prevent flames from traveling upward between floors during an emergency.
The inspector also verifies the proper spanning of floor joists to ensure they meet the specific load requirements for each room, preventing structural deflection. Stair stringer accuracy is another critical checkpoint, as precise measurements for rise and run are required to prevent trip hazards. At Grindstone Utility Construction, our professional residential building services include pre-checking these technical details to ensure a seamless approval process. We verify that all fasteners, bracing, and structural headers align with approved engineering documents before the inspector arrives on site, maintaining the high standards expected of Missouri residential builds.
Next Steps After Framing is Complete
Passing the framing inspection triggers a shift from structural assembly to protecting the interior. The immediate priority is achieving a dried-in status, a critical milestone where the structure becomes weather-tight. We begin by installing roof decking, typically using high-quality oriented strand board (OSB), followed by the application of a professional-grade house wrap. This moisture barrier is essential in the Jamesport climate, as it prevents wind-driven rain from saturating the new lumber while allowing internal water vapor to escape.
Once the roof is felted and the exterior is wrapped, our team transitions to the mechanical rough-in phase. This is when HVAC ductwork, plumbing supply lines, and electrical circuits are routed through the open wall cavities. Because you have already evaluated the home framing stage what to look for and confirmed wall placements during the frame walk, these trades can work efficiently without structural obstructions. Completing these professional residential building services inside a dried-in shell ensures that sensitive materials and equipment remain shielded from the elements. If you are ready to begin your building journey, contact us for a consultation to learn more about our construction expertise and project management process.